Setting up an instrument
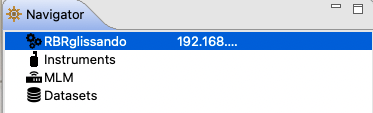
If your RBRglissando is already on Ruskin, you can link your instrument to the winch before the deployment. See Connecting to Ruskin on how to connect your winch.
|
An instrument linked to the RBRglissando will have three minutes of idle time before its Wi-Fiturns off, instead of only one minute. |
Steps to link your instrument
-
Unscrew the battery end-cap and connect your instrument to Ruskin via a USB port.
-
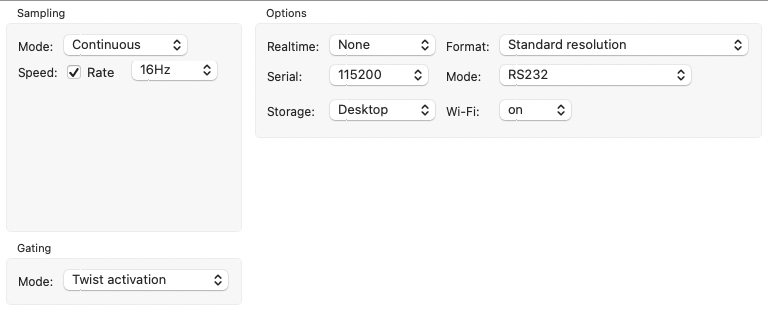
When the instrument appears on Ruskin, verify all settings.
RBR instruments ship with the fastest sampling Rate selected, the Wi-Fi enabled, and Gating set to Twist activation.
-
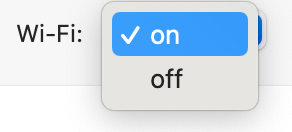
Ensure that the Wi-Fi option is enabled. If not, go to Options > Wi-Fi and select "on" from the dropdown menu
-
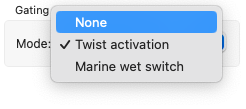
Ensure that Gating is set to Twist activation. If not, go to Gating > Mode and and select "Twist activation" from the dropdown menu.
-
Confirm that Ruskin can now see both the instrument and the RBRglissando.
-
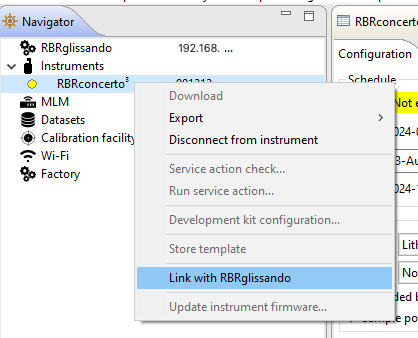
Right-click on your instrument and select Link with RBRglissando from the dropdown menu.
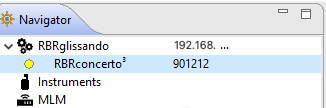
The instrument will move up to appear under the RBRglissando.
-
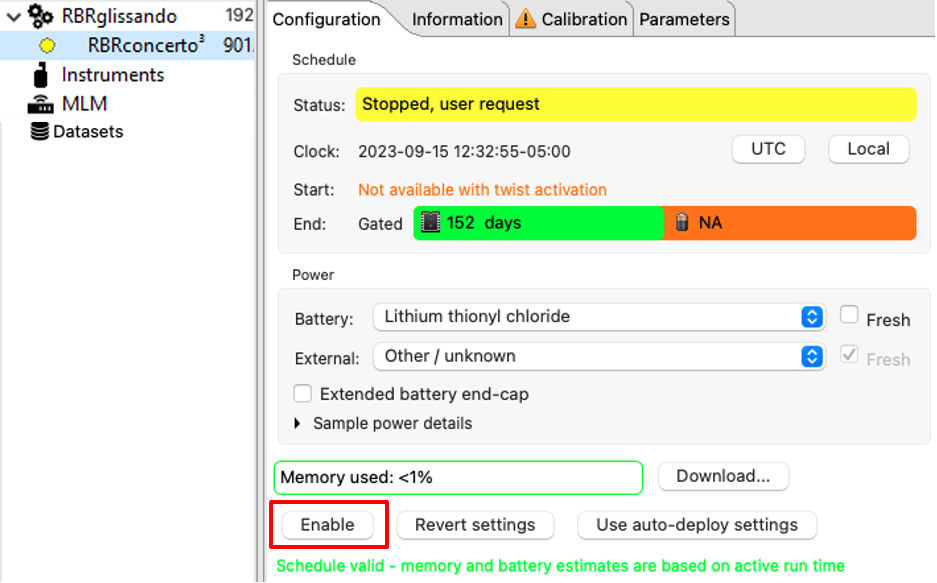
Click Enable in the Configuration tab to save all these settings to the instrument.
The yellow circle next to your instrument will turn cyan and the Status will update to Logging paused. The Enable button will become Stop.
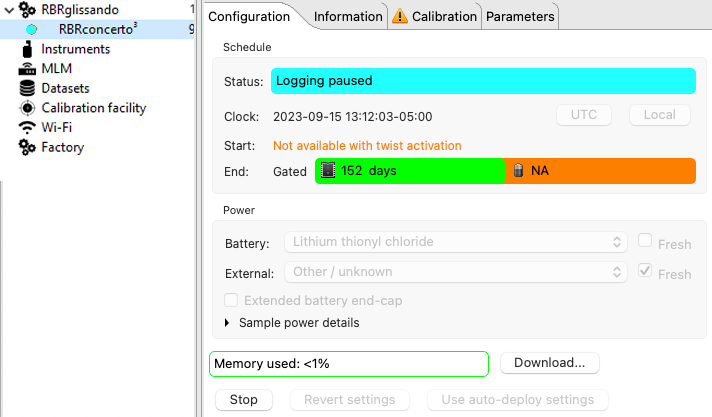
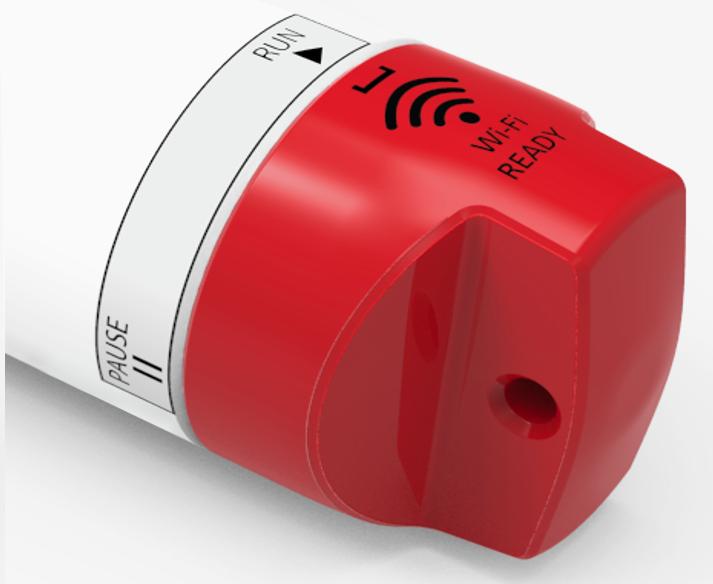
Sampling will only start when you twist the end-cap to RUN (see below).
-
Disconnect the USB cable and return the battery end-cap on the instrument.
The instrument will disappear from Ruskin. This is normal; proceed to the next step.
-
Twist the battery end-cap on the instrument to either direction to activate the Wi-Fi. The RBRglissando will see the instrument and automatically connect to it.
The instrument will re-appear on Ruskin, connected to the winch.
If you have twisted it to RUN, the instrument will also start logging. Twist the end-cap to PAUSE if you are not ready to start your deployment.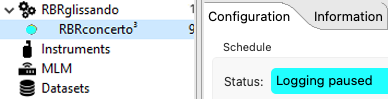
-
Secure your instrument at the end of the winch line using the soft shackle provided.
Steps to start the deployment
-
Check the colour of the circle next to your instrument.
If it is green, your deployment has already started.
If it is cyan or yellow, go to the next step. -
Twist the battery end-cap to RUN.
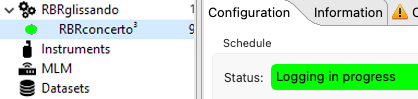
The cyan circle next to your instrument will turn green and the Status will update to Logging in progress.
Steps at the end of the deployment
-
When the deployment is complete, stop logging by clicking Stop in the Configuration tab for your instrument.

The green circle next to your instrument will turn yellow and the Status will update to Stopped, user request.
-
Right-click on the instrument and select Decouple from RBRglissando to unlink it.
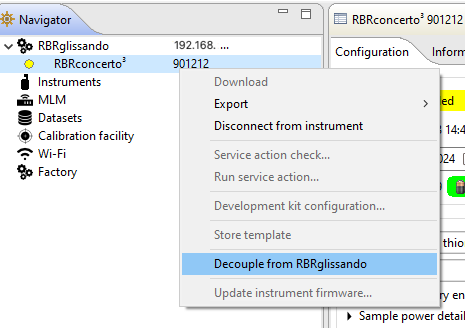
The instrument will decouple from the RBRglissando and move down to appear under Instruments.
|
Ruskin will remember a previous association and link the instrument to the RBRglissando upon reconnection. |