Couple an exchangeable sensor
RBR instruments with an “x” in the name, such as the RBRsolo⁴ x | 2x or the RBRduet⁴ D.x | 2x can connect to sensors by either direct connection or cabled connection.
|
Due to the weight of the RBRquadrante, couple it to an exchangeable instrument only via a cabled connection. |
Direct connection
Connection to a direct sensor is done via a coupler. The instrument has a custom-made female connector, which fits the male connector of the sensor.
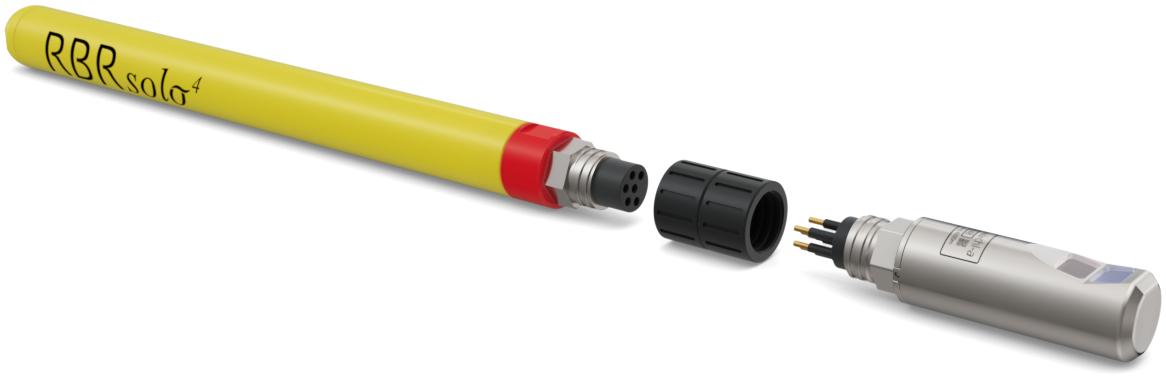
The coupler has two flanges with opposing threads. It is important to ensure the coupler is securely tightened so the connection is watertight.
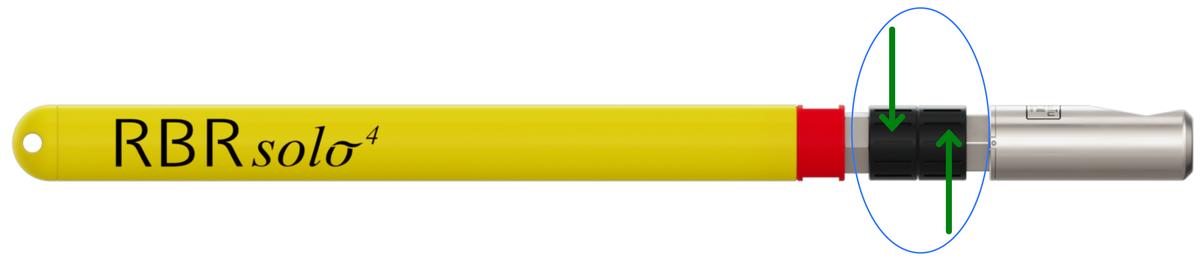
Instruments can be stored with the sensor connected; however, before deploying the instrument, it is important to verify that the coupler has not become loose. If that happens, you will see a small gap between the sensor and the coupler, or between the coupler and the base of the connector. Gently tighten the flanges to close the gap.
Disconnecting and connecting a sensor
-
Disconnect the sensor
-
Take the instrument in your left hand and hold it horizontally, with the sensor oriented to the right.
-
With your left index finger and thumb, prevent the left flange from moving.
-
With your right hand, hold the sensor tightly.
-
With your right index finger and thumb, twist the right flange clockwise until loose.
-
The sensor will drop into your hand.
-
-
Access the female connector
-
Twist the left flange counterclockwise.
-
Remove the coupler.
-
-
Lubricate the female connector (see Cables and connectors).
-
Reconnect the sensor
-
Place the coupler back on the instrument.
-
Twist clockwise until tight.
-
Very carefully mate the sensor to the instrument (the pins on the sensor must be aligned with the corresponding holes).
-
Press the sensor into the instrument to make sure the pins are inserted.
-
Continue to hold the instrument with your left hand.
-
With your right hand, hold the sensor tightly.
-
With your right index finger and thumb, twist the right flange counterclockwise while slightly pushing the sensor in with your palm.
-
Verify the tightness of both flanges.
-
|
Occasionally, the left flange may begin to loosen while you are tightening the right one. It usually means that the pins did not mate properly. Carefully align the pins again and press harder. Wiggle the sensor gently to make sure the pins are inserted. |
Cabled connection
-
Lubricate the female connector (see Cables and connectors).
-
Connect the cable to the sensor and the instrument.
-
Ensure both connections are snug, then slide the connector locking sleeves over each connection and tighten by hand.