Refilling the buffer oil

Required materials

  • Foam stand, with cutouts for the MCBH ports

  • 3mm and 5mm hex keys

  • O-ring

  • Silicone compound

  • Buffer fluid

  • Syringe with a stopper and needle

  • Syringe kickstand

  • Refill adaptor

  • Four socket head cap screws

All required materials for this procedure are provided with the support kit.

Refilling the buffer oil

Step Description Image

1

Prepare the instrument

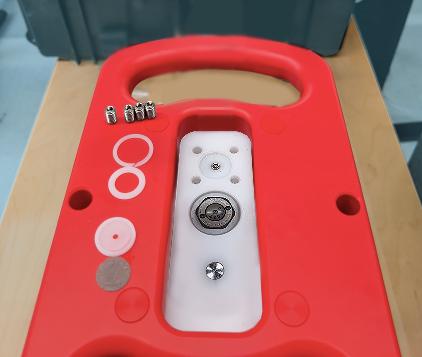
  1. Install your RBRquartz³ Q | plus into the foam stand, fitting the MCBH ports into the cutouts

  2. Remove the antifouling mesh assembly (see Removing the antifouling mesh assembly)

  3. Remove the four set screws around the pressure port using the 3mm hex key

qplus screws out

2

Prepare the refill adaptor

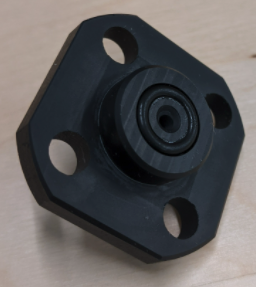
  1. Apply a thin film of the silicone compound to the O-ring of the refill adaptor

  2. Install the O-ring into the refill adaptor as shown in the image

screen shot 2021 03 09 at 11 56 22 am

3

Fill the buffer tube with oil

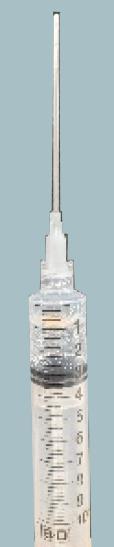
  1. Remove the stopper from the syringe

  2. Install the needle

  3. Invert the syringe so that the needle is point up

  4. Purge the air from the needle by depressing the plunger until a drop of oil comes out

  5. Insert the needle into the buffer tube assembly and fill it with oil to the top of the set screw

  6. When extracting the needle, continue to apply pressure to the plunger to maintain the oil level

  7. Draw the oil out of the needle and remove the needle

needle

4

Refilling the oil

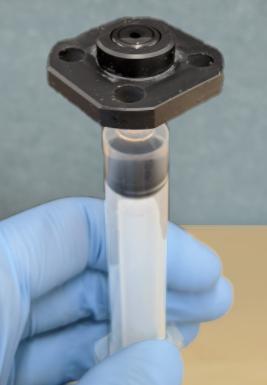
  1. Install the refill adaptor to the syringe

  2. Invert the syringe so that the refill adaptor is pointing up

  3. Purge the air from the refill adaptor by depressing the plunger until a drop of oil sits at the adaptor opening

    Ideally, the meniscus at the air-oil interface should be convex to minimise the air in the final assembly.

holding syringe

5

Install the refill adaptor

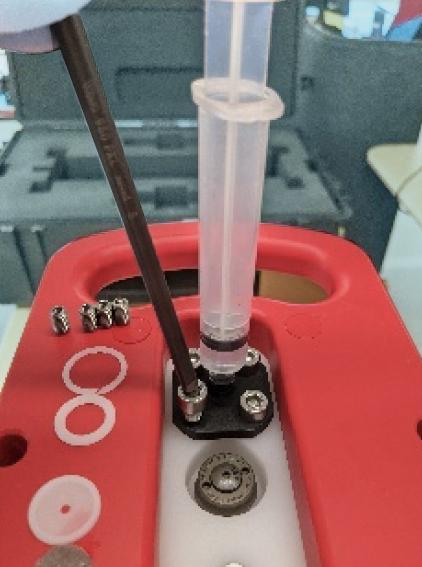
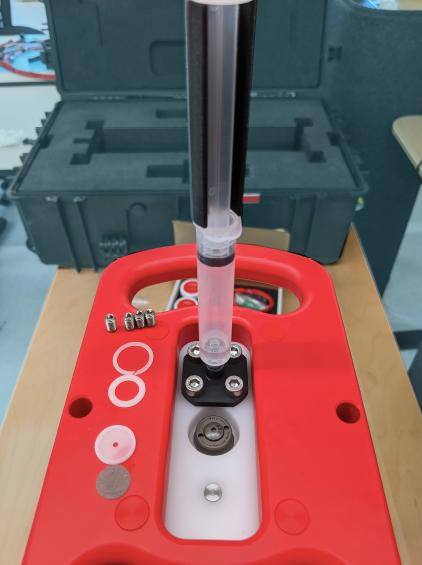
  1. Mate the refill adaptor to the pressure port

  2. Install the four cap screws with the 5mm hex key

    Do not apply pressure to the plunger when the syringe is installed on the pressure port! Doing so may exceed the pressure rating of the sensor.

qplus hex

6

De-gas the system

  1. Draw the plunger of the syringe just past the 10ml mark

  2. Install the syringe kickstand so that it cups the plunger and supports it in the drawn-out position; the syringe will brace against the flange on the plunger and the barrel

    Bubbles will be coming out of the system through the oil into the syringe, drawn into the rarefied air. The rate of bubbles coming out should quickly start to reduce. If it is not happening, tighten the syringe to the refill adaptor and tighten the four cap screws.

  3. Leave the syringe in this position for about an hour

  4. Remove the kickstand, while keeping the syringe in place

    The plunger will drop back, almost to the surface of the oil, due to low pressure inside the syringe.

  5. With everything still attached, draw the plunger of the syringe just past the 10ml mark again

  6. Very gently, pump the plunger up and down approximately ten times, until no bubbles come out of the system after drawing the plunger

qplus kickstand

7

Clean up and reassemble

  1. Remove the refill adaptor

  2. Remove excess oil from the pressure port with a tissue or swab

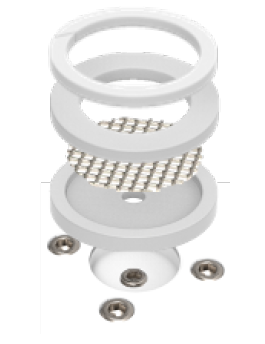
  3. Once cleaned, install the lower mesh insulator disk with the recess facing up

  4. Place the nickel-copper mesh in the recess of the lower mesh insulator disk

  5. Place the upper lower mesh insulator disk on top of the lower mesh insulator disk and nickel-copper mesh assembly

  6. Open the split on the retaining ring and ease its middle into the sensor end-cap recession

  7. Hold the retaining ring in place with one finger and feed the the rest of the ring into the sensor end-cap recession

mesh assembly