Deploying the RBRcervello Antarctica
Installing the RBRcervello Antarctica on site
Follow the steps below to set up the RBRcervello Antarctica on site.
Tools needed
5mm hex key
Philips #2 screwdriver
zip ties
cutting tool (not included!)
.
Open the crate.
Install the mooring line modem (MLM) lines.
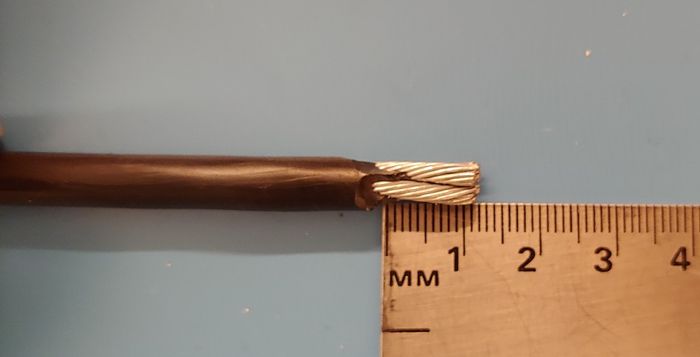
Cut the mooring line to the appropriate length to fit in the crate.
Strip both ends of the line by approximately 1cm.
.
.
.
.
.
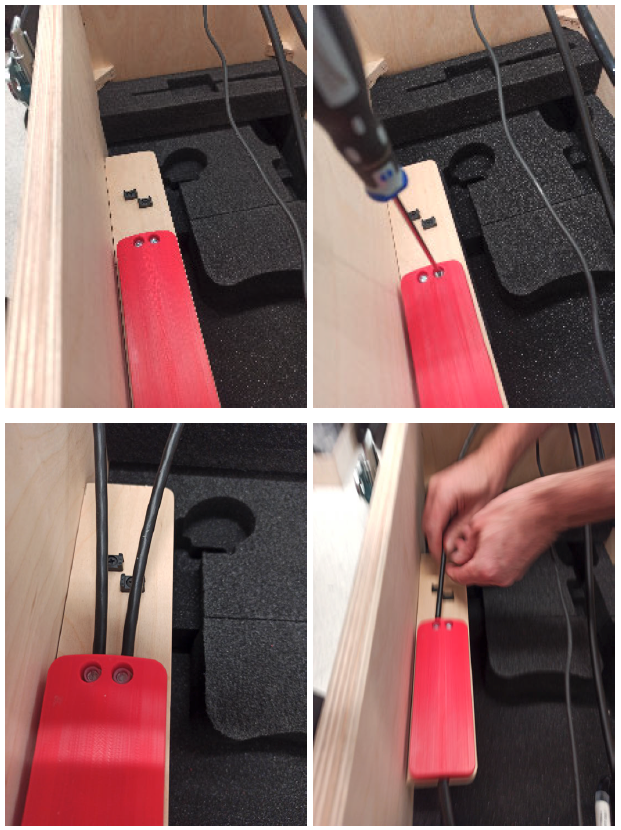
.Attach each of the MLM lines to the MLM lines junction box. Use the screwdriver provided.
.
.
.
.
.
.Secure each of the MLM lines to the crate. Use the zip ties provided.
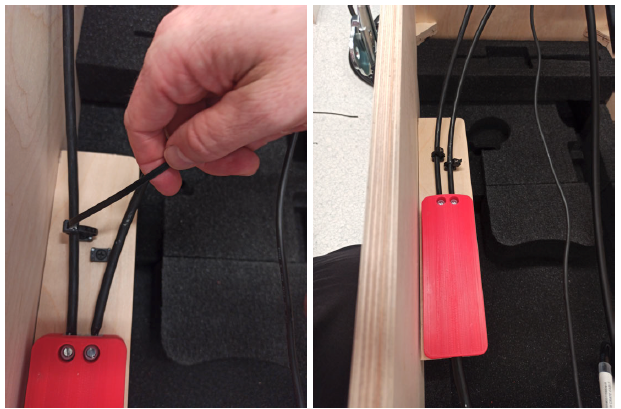
Secure each of the MLM lines to the crate using their dedicated clamping slot. Use the 5mm hex key provided.
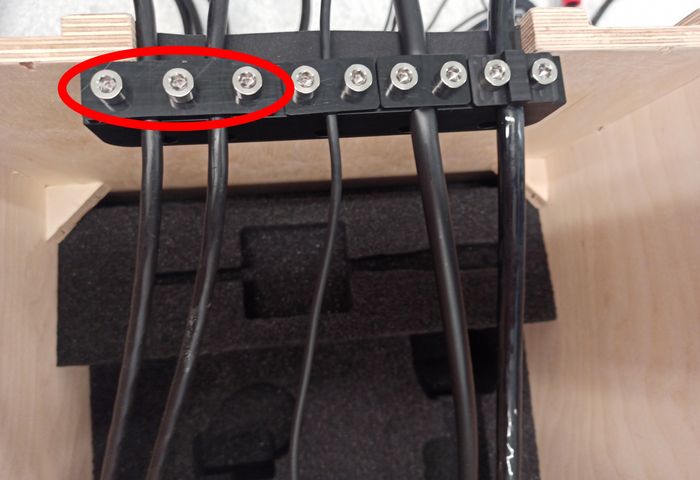
Attach the MLM lines junction box cable to the RBRcervello end-cap. Use the connector labeled "DIRECT CONNECT".
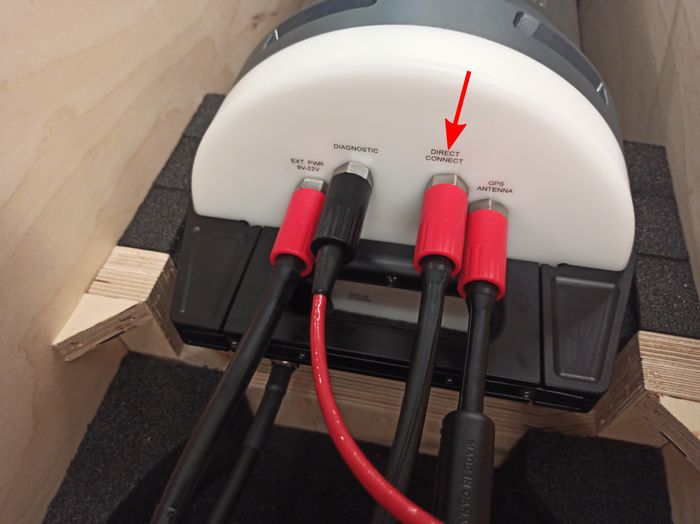
Install the Iridium antenna.
Attach the Iridium antenna to its cable.

Attach the Iridium antenna cable to the RBRcervello end-cap. Use the connector labeled "IRIDIUM ANTENNA".
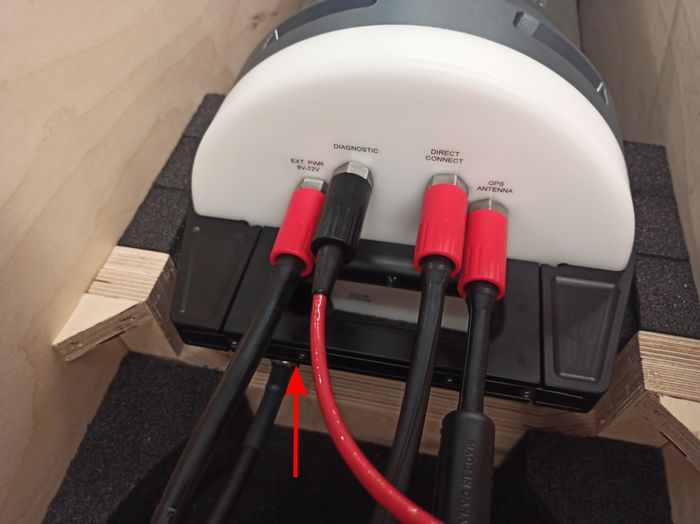
Secure the Iridium antenna cable to the crate via its dedicated clamping slot. Use the 5mm hex key provided.
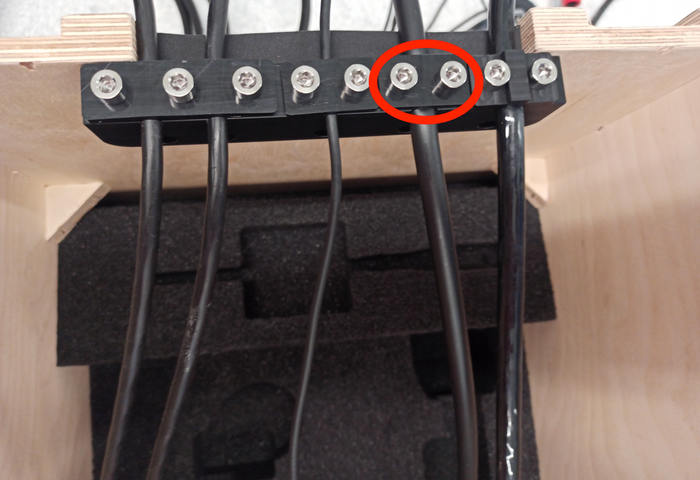
Install the GPS antenna.
Attach the GPS antenna to the RBRcervello end-cap. Use the connector labeled "GPS ANTENNA".
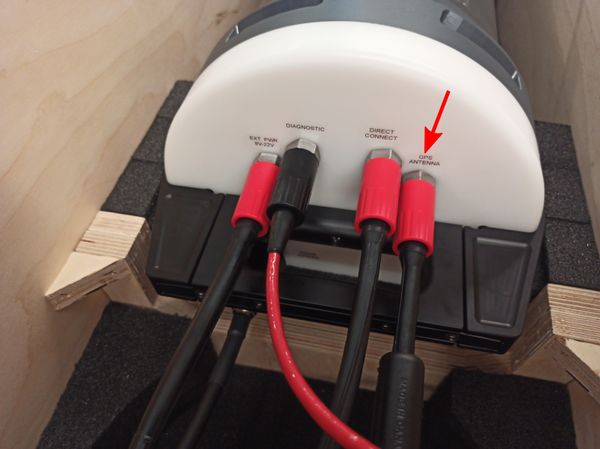
Secure the GPS antenna cable to the crate via its dedicated clamping slot. Use the 5mm hex key provided.
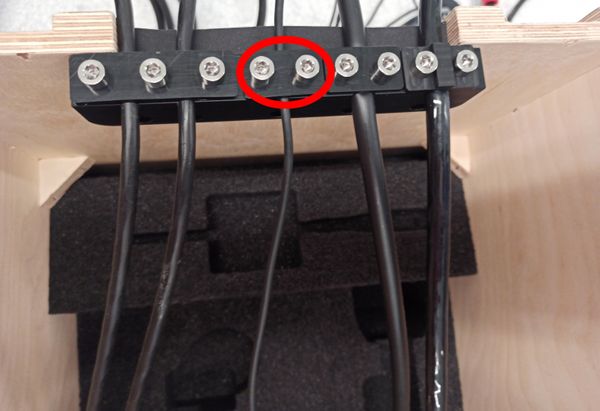
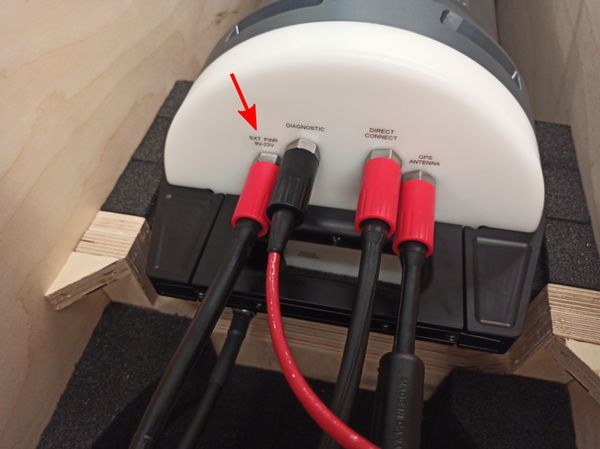
Install the external power source (if applicable).
Attach the external power cable to the RBRcervello end-cap. Use the connector labeled "EXT. PWR".
Secure the external power cable to the crate via its dedicated clamping slot. Use the 5mm hex key provided. Note that the tab of the slot has two different sides to accommodate 6.3mm and 9.5mm cable diameters.
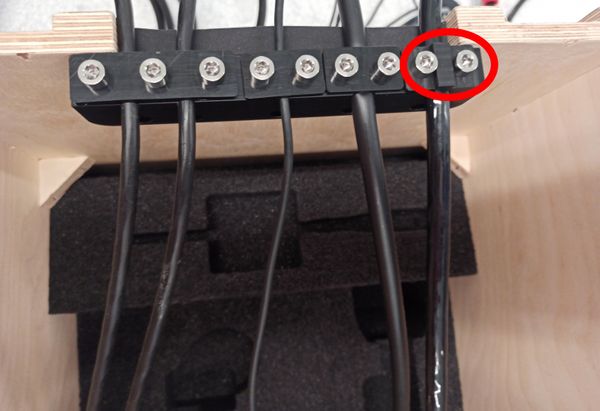
Enabling the RBRcervello
1. Attach the provided patch cable to the RBRcervello end-cap. Use the connector labeled "DIAGNOSTIC".
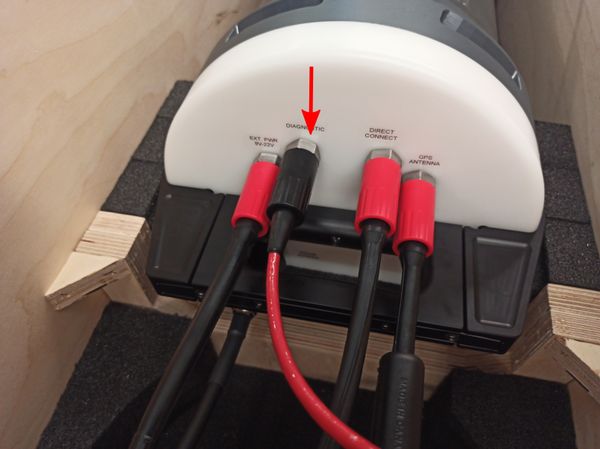
2. Follow the steps in Using the diagnostic port to set up the terminal and access the RBRcervello's menu.
3. Enable the RBRcervello by using the "enable" command.
4. Use the "status" command to check the status of all instruments attached to the mooring line. Verify that they are all logging.
The instrument status updates can take up to 20 minutes, depending on the number of instruments attached to the MLM line.
RBRcervello> status
RBRcervello
Serial number: 208685
Part number: 0011493
Cervello firmware version: 1.16.0
Clock: 2021-10-29 02:24:35
Cervello status: logging
Cervello internal battery: 13.68 V
Cervello external battery: 1.31 V
Storage used : 168 MB
Storage remaining: 14355 MB
Storage size : 15299 MB
Telemetry last update: 2021-10-29 02:00:09
Telemetry last result: success
Telemetry last mode : rudics
GPS last update : 2021-10-29 02:17:59
GPS last result : fixacquired
GPS last known position: 45.349128 -75.917473
Instrument 01 last update : 2021-10-29 02:24:06
Instrument 01 : logging
Instrument 01 internal battery: 5.11 V
Instrument 01 external battery: 0.00 V
Instrument 02 last update : 2021-10-29 02:23:37
Instrument 02 : logging
Instrument 02 internal battery: 4.74 V
Instrument 02 external battery: 0.00 V
Instrument 03 last update : 2021-10-29 02:20:45
Instrument 03 : logging
Instrument 03 internal battery: 4.69 V
Instrument 03 external battery: 0.00 V
Instrument 04 last update : 2021-10-29 02:23:02
Instrument 04 : logging
Instrument 04 internal battery: 4.90 V
Instrument 04 external battery: 0.00 V
Download remaining: 0B