
Quick start guide
Tools needed
USB to MCIL-6-FS cable (provided)
MLM test loop (provided)
Computer with a USB port
Serial terminal
The deep-sleep feature will be disabled while the RBRcervata is connected to the computer USB port.
If you connect the USB cable while the data controller is in a deep-sleep state, it can take up to 15s to boot and register on your computer.
Configuration
RBR configures each RBRcervata to work with a specific instrument. For details particular to your instrument or to change the configuration, please contact RBR.
To estimate power and telemetry requirements, use the RBRcervello Deployment Calculator.
Use your instruments or sub-surface modems (SSM) only with a properly configured data controller. Failure to do so will result in invalid data.
Before a deployment
Open the RBRcervata following the steps in Opening the RBRcervata.
Install fresh batteries (48 x D-cells) and desiccant following the steps in Hardware overview.
Connect the RBRcervata USB MCBH port to a computer via the provided USB to MCIL-6-FS cable.
Open a terminal on the corresponding communications port following the instructions in Using the USB port.
Press Enter and wait until you see the
RBRcervello>prompt.Type
disableand press Enter. See disable for more information.(Optional but recommended) Apply any pending software updates by following the instructions in Updating the instrument.
(Optional) Apply any pending configuration updates by following the instructions in Updating the instrument.
Update the firmware and configuration separately otherwise the configuration update may not be applied.
Test the MLM loop by following the instructions in MLM troubleshooting.
Type
scrub-instrumentand press Enter to erase any data that might be stored in the instrument(s). See scrub-instrument for more information.Type
scrub-controllerand press Enter to erase any data that might be stored in the RBRcervata. See scrub-controller for more information.Type
set-cervello-clock YYYY-MM-DDTHH:MM:SSwith the appropriate time in UTC and press Enter to synchronise the clock on the RBRcervata. See set-cervello-clock for more information.
If the RBRcervata establishes communications with an instrument within 24h of the RBRcervata clock being set, the RBRcervata will set the instrument clock to its own clock.
This allows the RBRcervata to update the clocks of instruments left logging while the RBRcervata is retrieved along with their data.
Type
statusand press Enter to verify that the instruments and the controller have thedisabledstatus. See status for more information.(Optional) Type
enableand press Enter to begin the deployment and enable the instruments immediately. See enable for more information.(Optional) Type
statusand press Enter to verify that the instruments and the controller have theloggingstatus.Disconnect the USB to MCIL cable from the RBRcervata.
Close the RBRcervata following the instructions in Closing the RBRcervata.
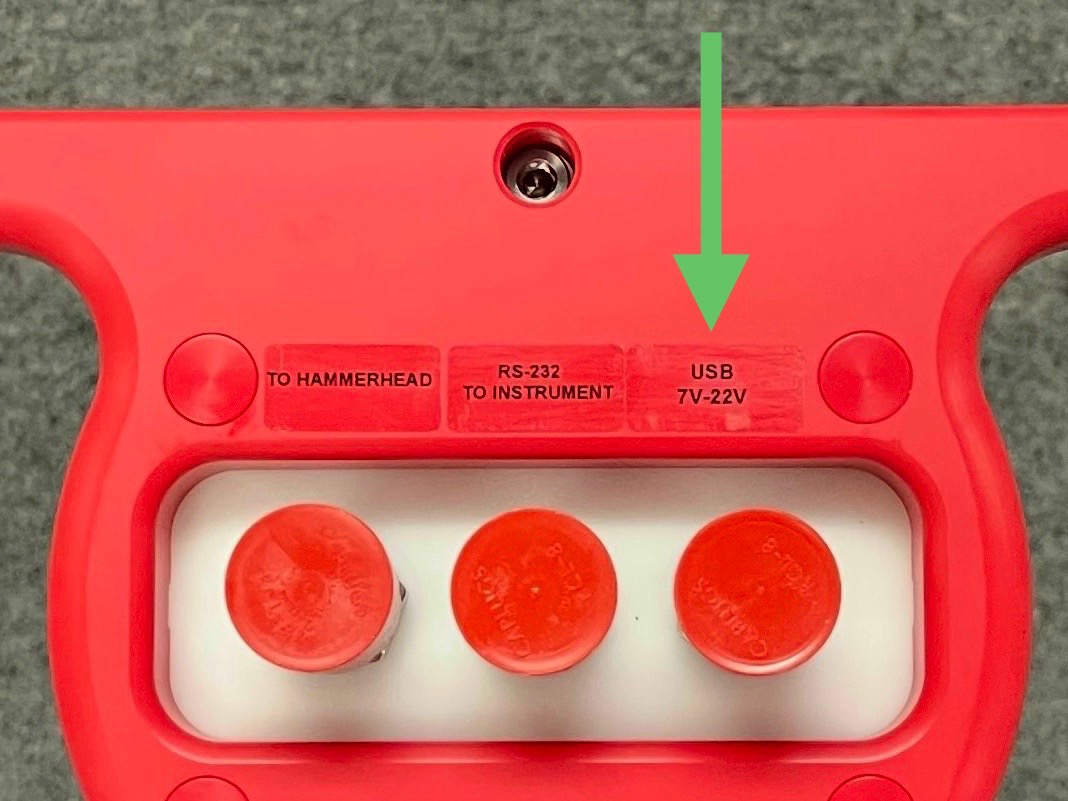
USB interface port
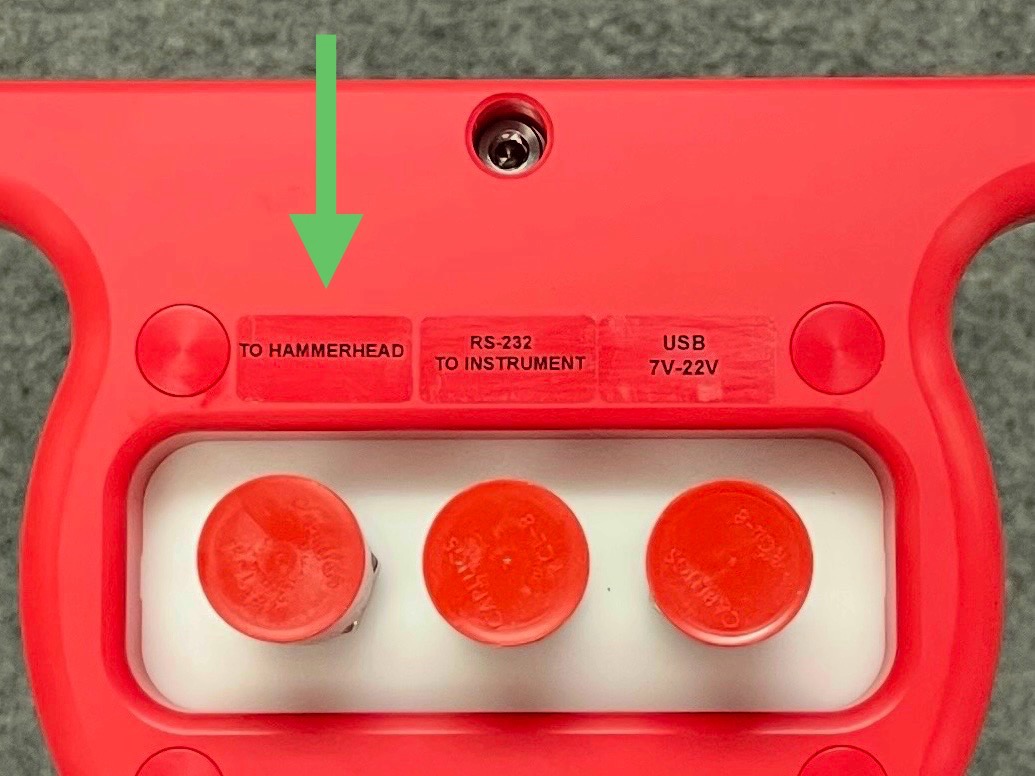
MLM port
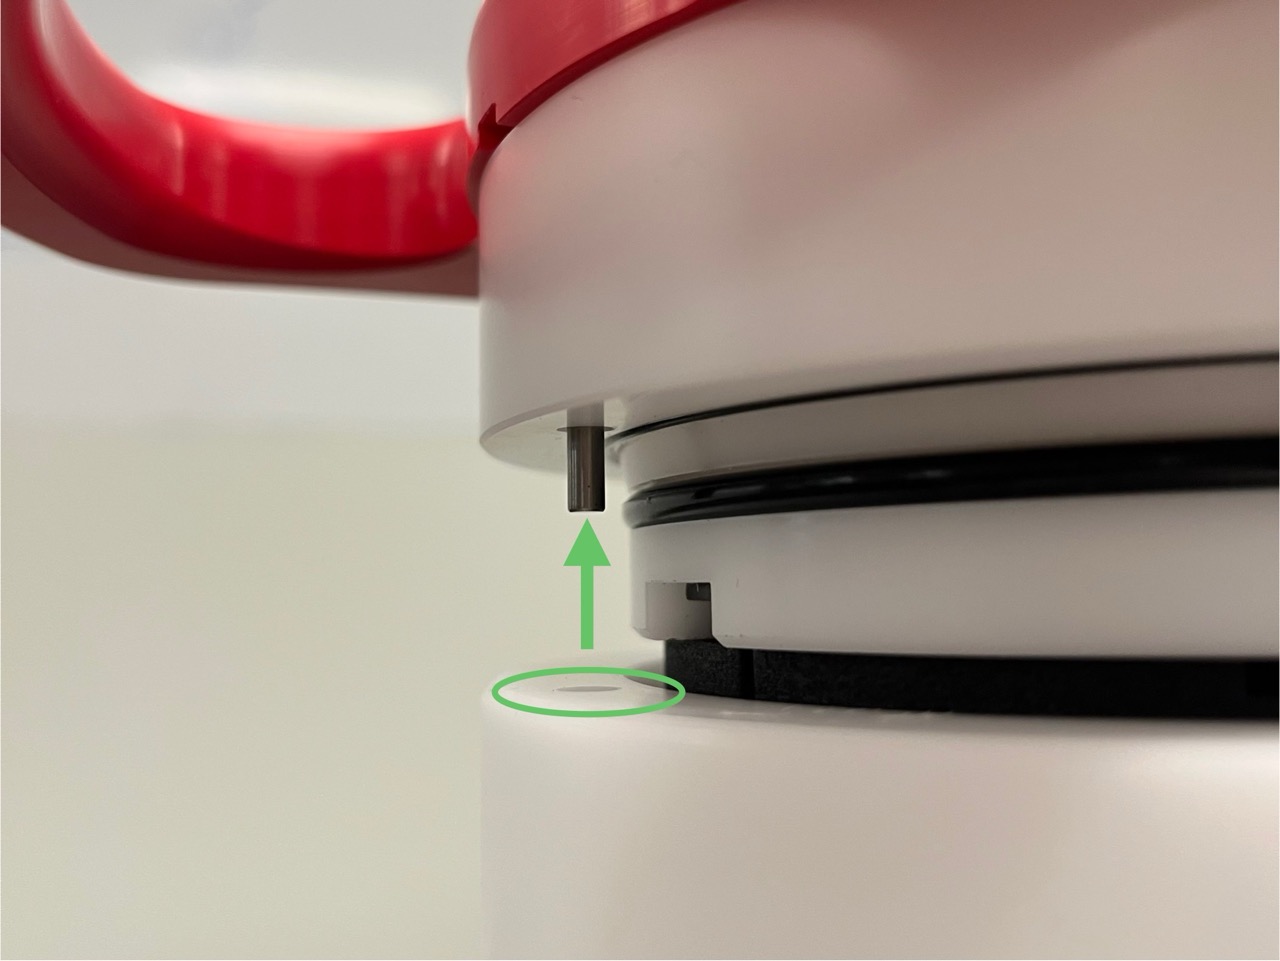
Endcap alignment pin
After a deployment
After retrieving the RBRcervata
Connect the RBRcervata USB MCBH port to a computer via the provided USB to MCIL-6-FS cable.
Apply power using the USB to MCIL-6-FS cable as the battery pack might be depleted.
Open a terminal on the corresponding communications port following the instructions in Using the USB port.
Baud rate, the number of data/parity/stop bits, and flow control settings do not matter for USB communication devices.
Press Enter and wait until you see the
RBRcervello>prompt.Type
disableand press Enter. See disable for more information.Type
set-cervello-clock YYYY-MM-DDTHH:MM:SSwith the appropriate time in UTC and press Enter. This will allow for timestamp correction after retrieving the data. See set-cervello-clock for more information.
If the RBRcervata establishes communications with an instrument within 24h of the RBRcervata clock being set, the RBRcervata will set the instrument clock to its own clock.
This allows the RBRcervata to update the clocks of instruments left logging while the RBRcervata is retrieved along with their data.
Type
statusand press Enter to verify that the instruments (if any) have thestoppedstate and the controller has thedisabledstate.Retrieve data via the USB port following the steps in Retrieving data.