Connecting to instruments with CoolTerm (MacOS)
Before using CoolTerm, always configure the instrument in Ruskin first.
To establish a realtime connection between the instrument and your computer, follow these steps:
Open Ruskin.
To establish communication between the logger and a computer, remove the battery end-cap and locate the USB-C connector, just below the battery cover, or on the underside of the battery end-cap for the RBRquartz3 BPR | zero. The supplied interface cable is plugged into this connector. The USB-C connector can be inserted with either side facing up.
The logger should appear in the Navigator view after a few seconds.
Click the logger that you want to use. Ensure that it contains the sensors you expect to find on the logger by viewing the Information tab in the Properties view on the right side of the Ruskin window.
To get realtime data, ensure that the settings in Ruskin are accurate.
Go to Configuration > Options > Realtime and select "Serial".
Click "Local" to sync the instrument clock with your computer.
Check the "Now" box to start streaming immediately. Otherwise, set the start time for future streaming.

6. Click "Enable".
If you enable the instrument, and it is not your first schedule, you will see the warning, "The contents of memory will be erased!"
Before proceeding, download the data from the instrument (see the Download section in pertinent user guides). If you are sure that the information is saved, then click "Erase" and enable logging.
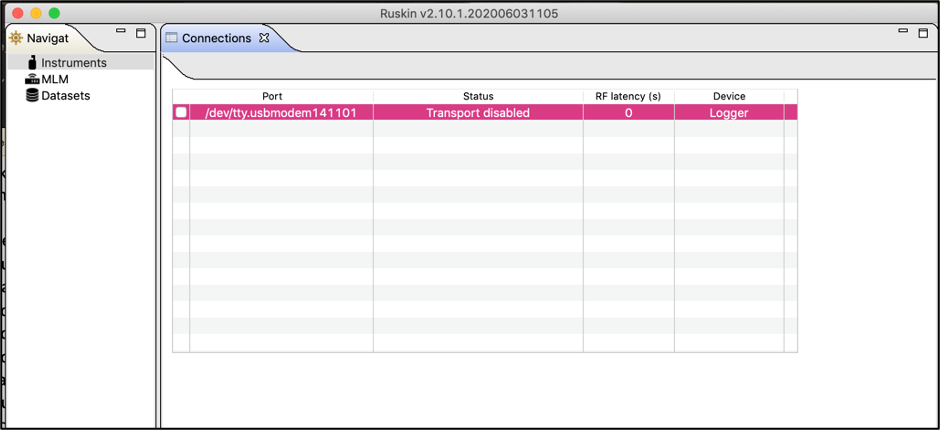
7. Deselect the port by clicking on "Instruments" and unchecking the checkbox. This step is necessary because the instrument will not be able to connect to both Ruskin and CoolTerm simultaneously.
8. Open the CoolTerm software.
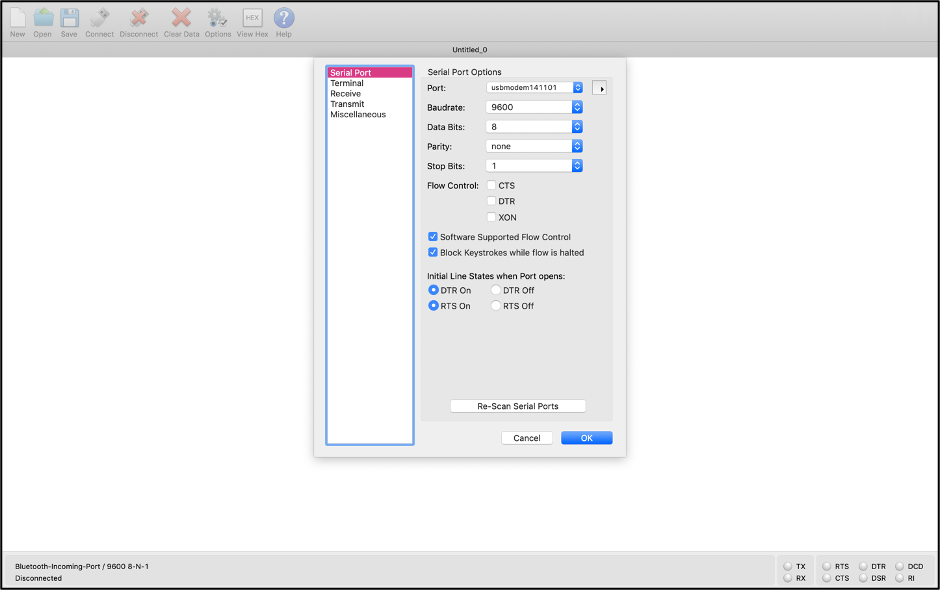
9. To choose the port, go to Options > Serial Port > Re-scan ports >. Choose the appropriate port and click "OK".
Make sure the selected port matches the port deselected on Ruskin.
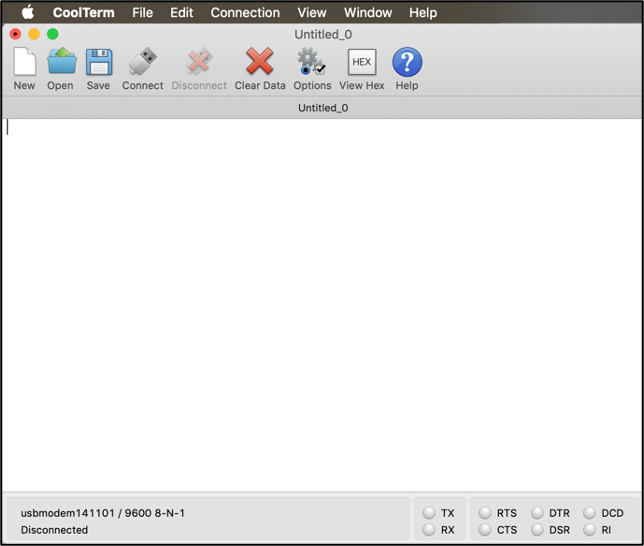
10. To start collecting data, click "Connect".
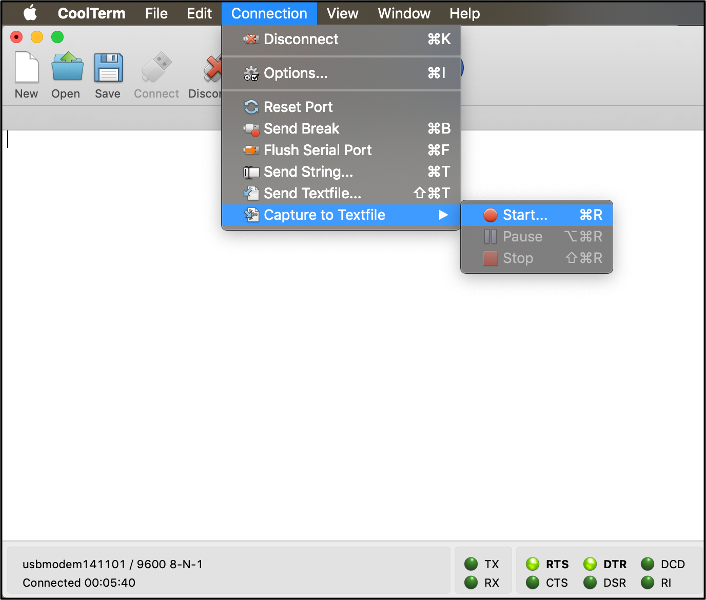
11. To save the recorded data to your directory, go to Connection > Capture to Textfile > Start.
12. To start typing commands:
a. Go to Options > Terminal> Raw Mode
or
b. Click Connection > Send Strings
The "Send String" dialog box will appear. Type "Commands" and click "Send".
Using the raw mode will not allow you to see the feedback from the instrument in the command window.
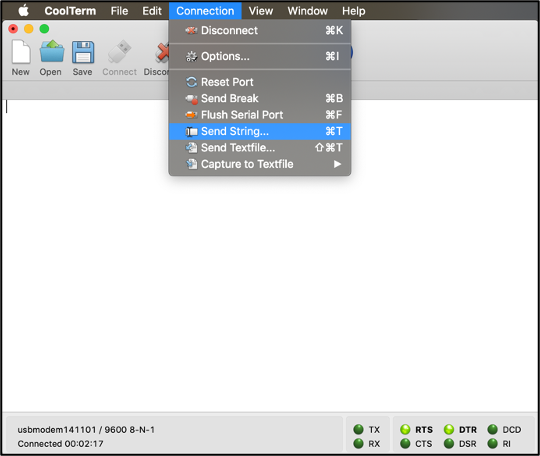
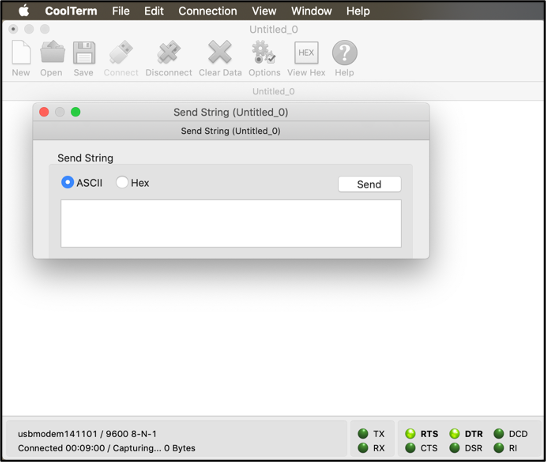
or
c. Go to Options > Terminal > Line Mode.
Type your command in the box that appears below, then click "Enter".
Line mode will allow you to see the command line in the terminal window.
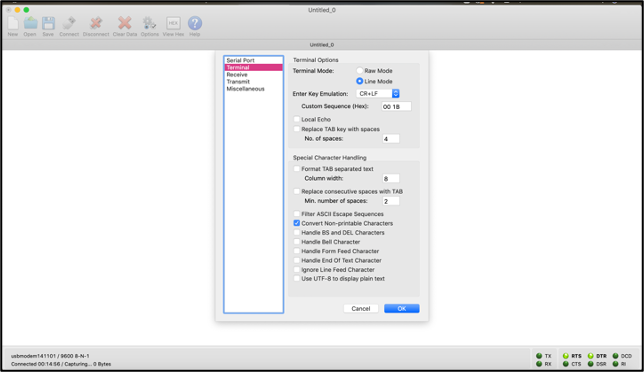
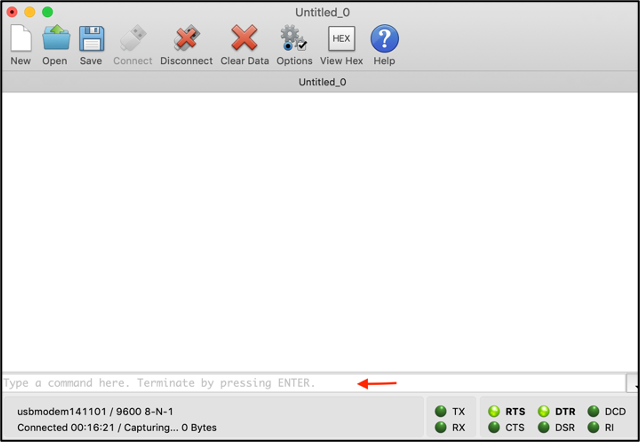
For instance, if you type the ID command, it will give you information about the name of the instrument, version number, and serial number.
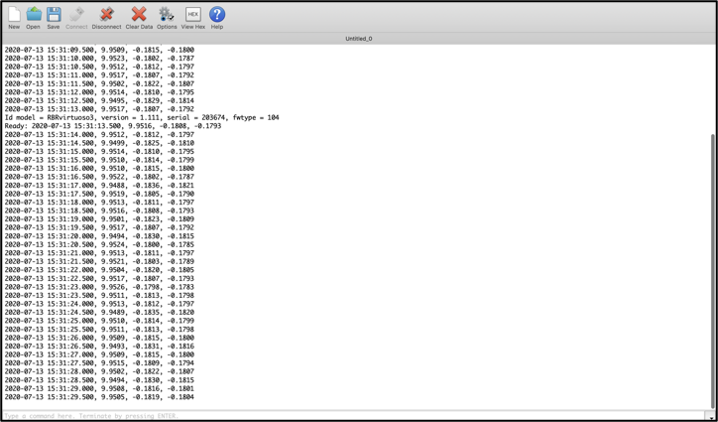
For more information about different commands, see the Logger3 Command Reference document.
The "Help" menu is available for users that need more information on the operation mode.
