Standard instrument sleep current test
The sleep current of the instrument can be tested to determine if the electronics are damaged. Ensure the instrument is not logging and the batteries are removed before you begin.
Unscrew the housing from the sensor end-cap (Fig. 1), much like you would unscrew the battery end-cap as the threading is similar. The guard on the instrument may cover the seam where the body meets the sensor end-cap. In this case, hold the guard itself when twisting.

Fig. 1
Connect an ammeter and external power source to the instrument in series (Figs. 2-4).
Attach the positive connection to the small metal tab under the battery door. Attach the negative connection, also known as the ground, to the metal tabs near the sensor end-cap.
Use an input voltage of 12V for the test.
Typically, a current of less than 10 microamps (μA) is expected. If the current is significantly higher than 10μA, there is likely an issue with the instrument. Contact us at support@rbr-global.com for advice.

Fig. 2
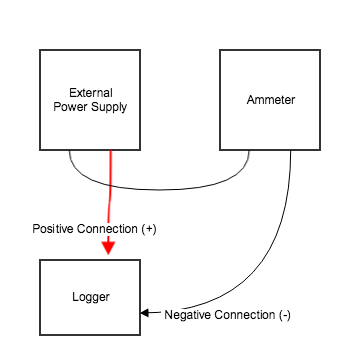
Fig. 3


Fig. 4