
Replacing the desiccant
Refer to Hardware overview for details on accessing the desiccant canisters.
Replacing desiccant canisters
RBR recommends replacing all desiccant canisters before each deployment. The use of fresh desiccants will keep the RBRcervata compartment dry and prevent the electronics from being damaged due to condensation inside the controller. As a preventative measure, RBR recommends always using fresh desiccant packs and, when possible, servicing the instrument in a cool, dry place.
Avoid using a metal screwdriver or any other tool which may scratch the electronics assembly.
To remove each desiccant canister, use a finger or a soft plastic or wood tool to lever the cap-side of the canister up and out of its holder.
To install each fresh desiccant canister, first press the side opposite the canister cap into the holder, then press the cap-side of the canister into the holder. Both sides of the canister should click into place.
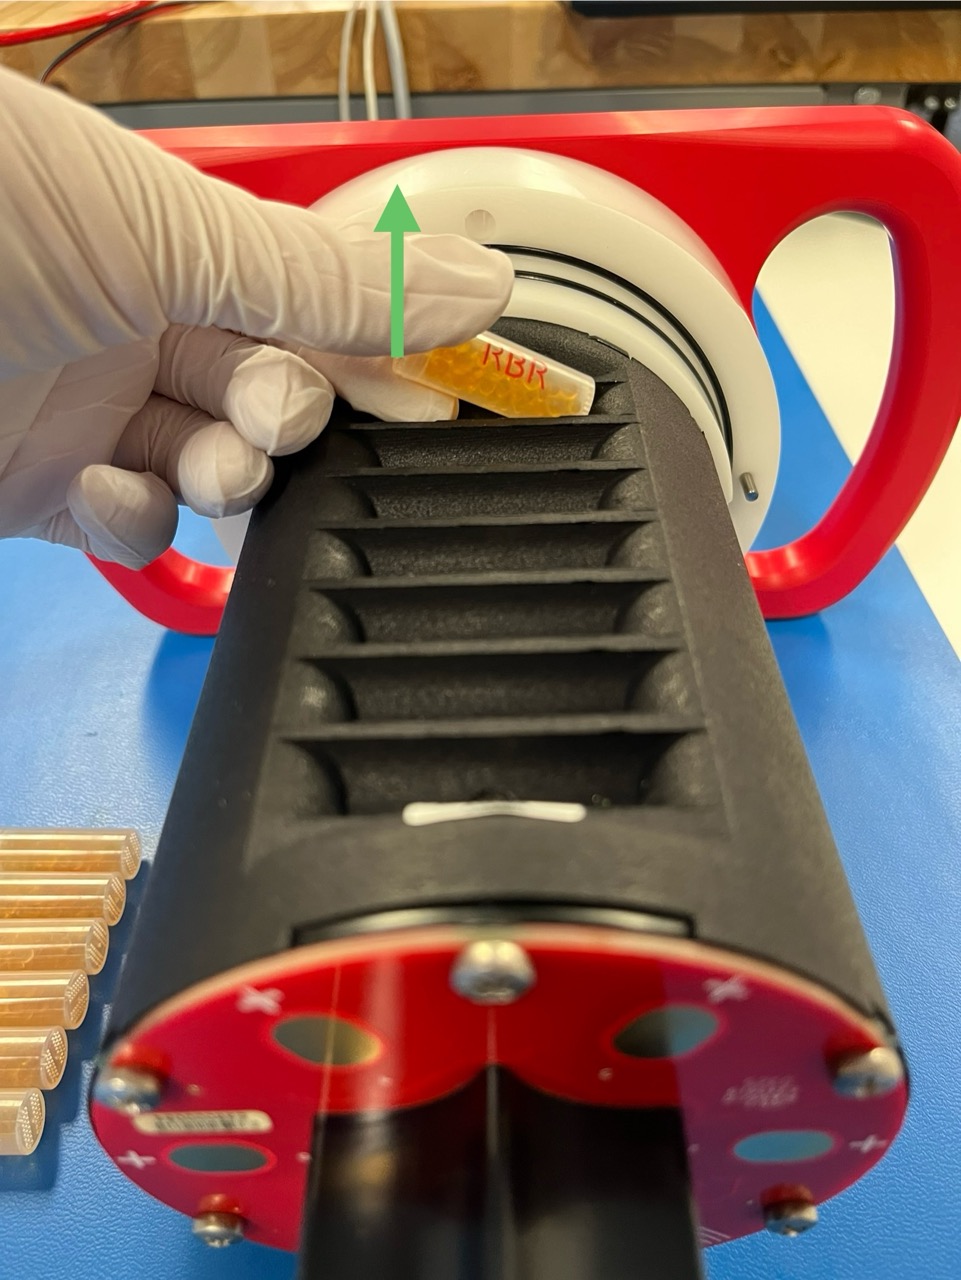
Remove desiccant canisters cap-first
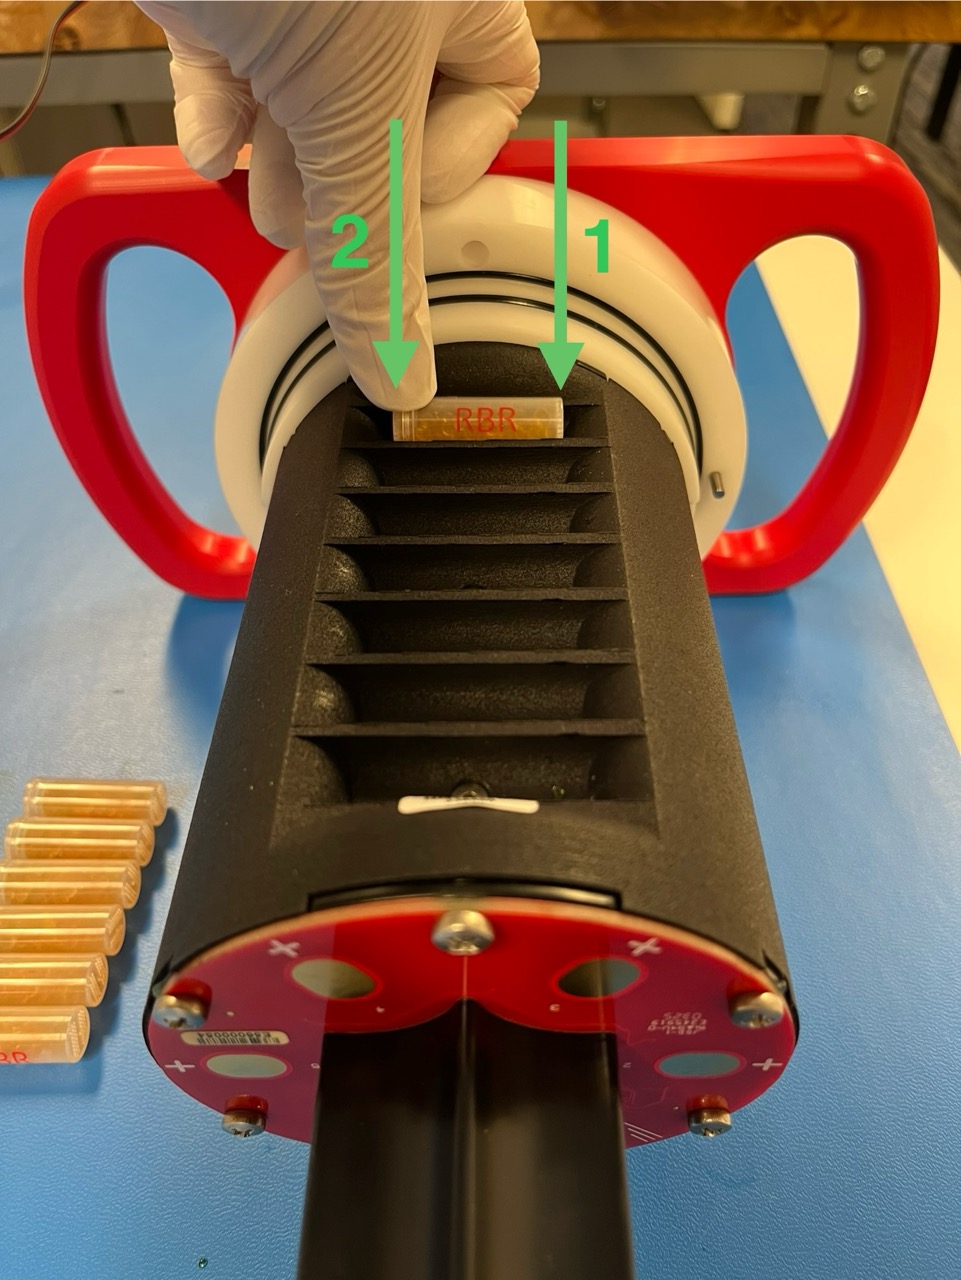
Insert desiccant canisters end-first
Reusing the desiccant
All instruments ship with fresh reusable desiccant capsules. They use a cobalt-free colour changing indicator dye. Orange indicates fresh desiccant, while green indicates it is saturated (about 15% water by weight). Once exhausted, the capsules can be replaced with new ones (available from RBR), or refreshed.
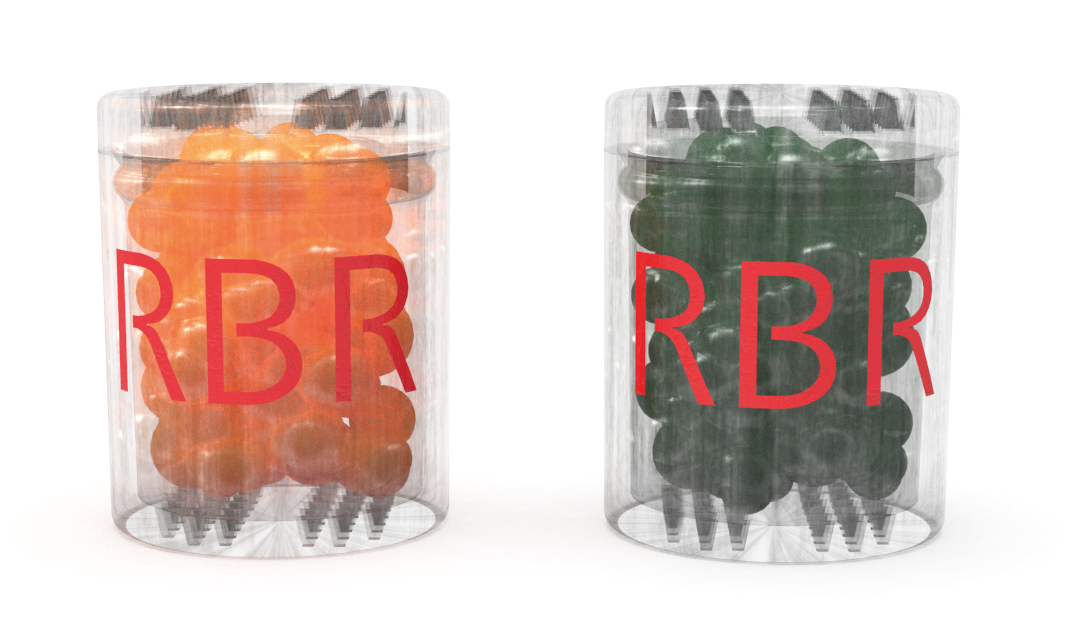
Desiccant capsules. (orange) Fresh. (green) Saturated
Refreshing the desiccant
Follow the steps below to refresh the desiccant.
Remove the saturated silica beads from their capsule.
Place them in the oven and heat at 120°C (250°F) for about two hours.
.Always remove the beads from their capsule before refreshing!
The capsule will deform if heated to 120°C..
Take the refreshed beads out of the oven and return them to the capsule.
.Return the refreshed beads to the capsule immediately after reheating!
If left outside the capsule, the desiccant will trap moisture and go back to green..
Wait until the silica beads cool down. Once cool, the desiccant is ready to be reused.