Removable storage
The RBRcervata data controller is designed for long-term deployments, over which comparatively large volumes of data will be collected. To facilitate easy bulk data retrieval from the system, the data is stored on an SD card which can be removed from the data controller and connected to a desktop computer.
Storage format
The data controller can use SD, SDHC, or SDXC memory cards which are formatted with an NTFS, ext2/3/4, or FAT32 filesystem. (exFAT is not supported.) The system ships with a 128GB, NTFS-formatted SDXC card installed, which is sufficient to store around three years of 10-channel, 32Hz data.
Datasets are stored on the SD card in the data/ directory. Datasets are stored in an RSK format compatible with Ruskin. Data within these RSKs is only minimally processed, and each dataset must be opened with Ruskin at least once before it can be opened with RSKtools.
The data controller can also be reconfigured by placing replacement configuration files within the config/ directory on the SD card.
Removable storage status
The data controller is equipped with two LEDs that are positioned near to the SD cardholder. These LEDs indicate when the SD card can be safely removed from the data controller.
| Green LED | Red LED | Meaning | Safe to remove the SD card? | Safe to insert SD card? |
|---|---|---|---|---|
| Off | Off | The system is powered down or is in deep sleep. | Yes | Yes |
| On | On | Immediately upon power-on for a fraction of a second, both LEDs are illuminated. | No | No |
| Off | On | The data controller is booting or has finished booting, but no SD card is connected. | No | Yes |
| Off | Blinking | The data controller is writing to the SD card as it downloads from a connected instrument, or as it collects internal diagnostic information. | No | N/A |
| On | Off | The data controller is powered and running normally, but the SD card is not being actively used. There is no instrument connected or instrument data has been fully downloaded, but the data controller is not configured to enter deep sleep. | Yes | Yes |
An instrument can be connected to or disconnected from the RBRcervata at any time. Power delivery to an attached instrument is constant, regardless of the state of the data controller, including deep sleep.
SD card removal/reinsertion
The SD card is held in place by sliding and pivoting retention door. To remove the SD card from the holder:
- Unlock the door by sliding it backwards toward the closest edge of the circuit board (toward the connectorized end cap of the RBRcervata).
- Pivot the door open. It is hinged on the end closest to the edge of the circuit board, and slightly spring-loaded, and will freely pivot up from the circuit board.
- Slide the SD card out of the door. The edges of the door have retaining tabs that hold the SD card in place and keep it aligned during insertion.
To reinsert the SD card into the holder, perform the same process in reverse:
- Slide the SD card into the door, being careful to fit the SD card within the retaining tabs on both sides of the door.
- Pivot the door closed. Be gentle; the door hinges may bind up while closing. The door should pivot closed with practically no exertion of force. If the door does not close willingly, open it again, make sure it is aligned straight with the base of the SD card holder and fully pushed into the unlocked position, and try again.
- Lock the door by sliding it forwards. You will feel a minor tactile detent as it locks into place.
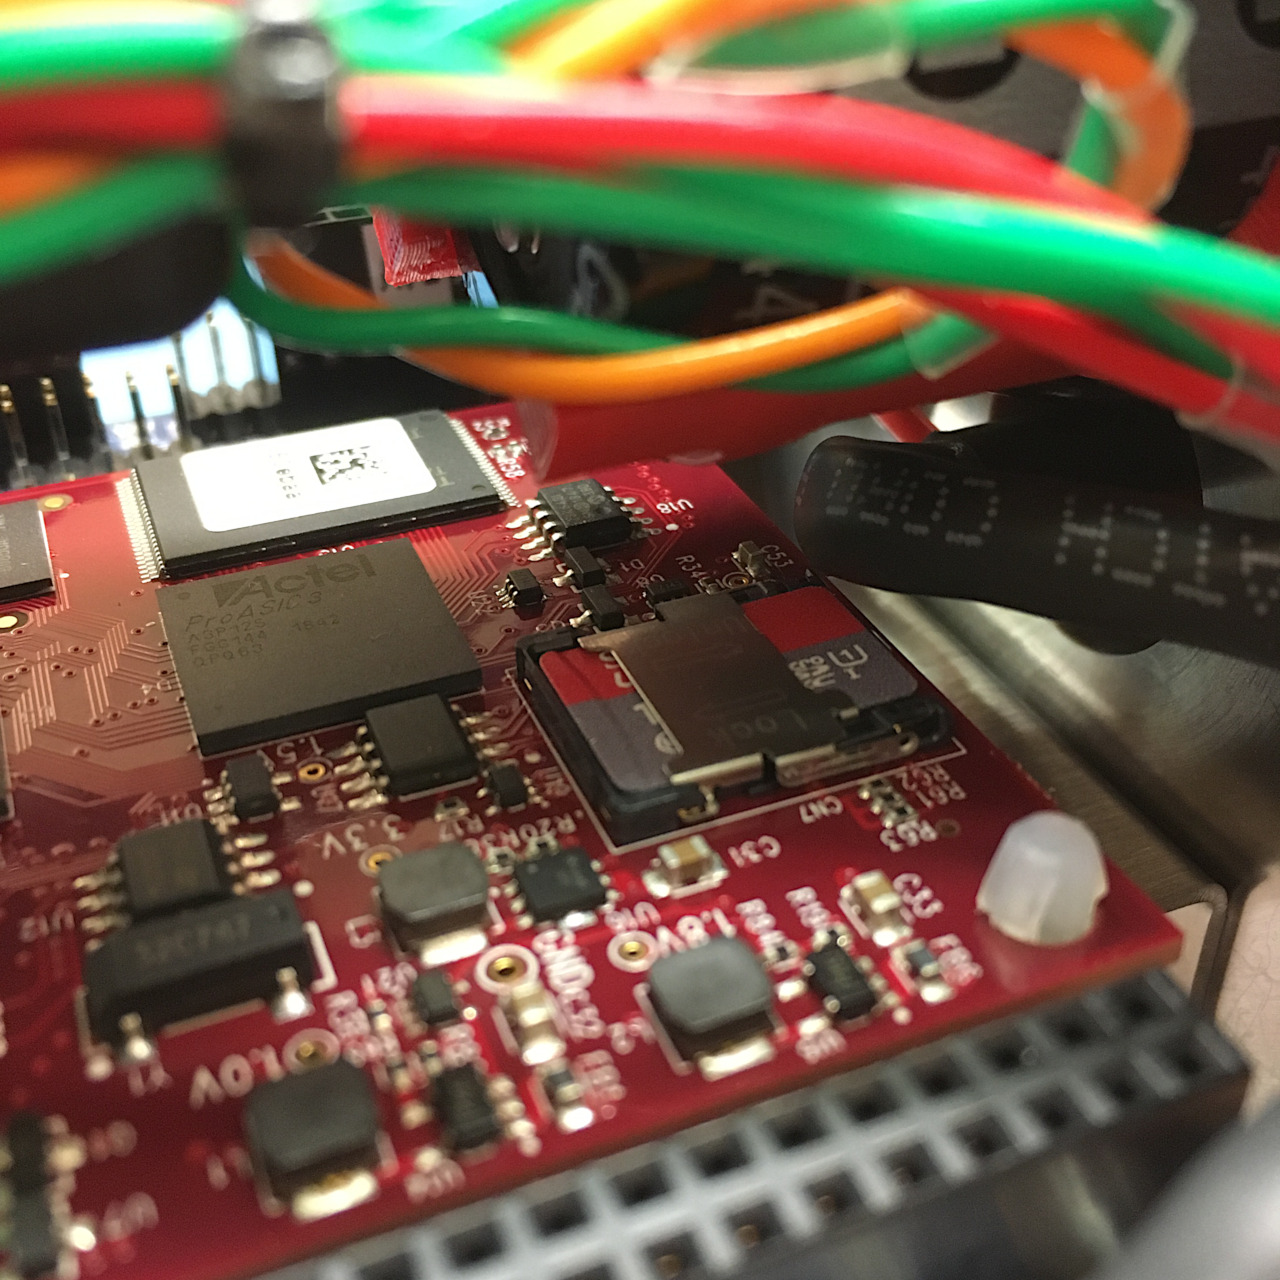
A closeup of the SD card holder within the RBRcervata.