Bench testing
- a computer running Ruskin
- a USB cable as appropriate to connect your instrument (RBRconcerto or RBRmaestro) to your computer
- a test loop for the MLM, as described in Required tools
An end-to-end bench test of the system will exercise all of its individual components and confirm that:
- the RBRcervello telemetry (either GSM or Iridium RUDICS) is operational
- the mooring line modem (“MLM”) head-end modem (“HEM”) can communicate with the sub-surface modem (“SSM”)
- the RBRcervello can communicate with the instrument via the MLM
Before beginning the test, ensure that the instrument (RBRconcerto or RBRmaestro) has been stopped, and its memory is empty. This practice should always be followed where possible before connecting an instrument to an RBRcervello: if the amount of data stored in the instrument is below a configured threshold, the data controller will attempt to download it before starting a new deployment; if there is a lot of data in memory, this can cause a considerable delay.
- Uncouple the SSM from the instrument by unscrewing them at the coupler. Unscrew from the instrument side, then carefully disconnect the umbilical cable running between the two.
- Connect the instrument to a computer via USB and open Ruskin.
- If the instrument is logging, stop it.
- Click the “UTC sync” button to synchronize the instrument clock to UTC time.
- Start a new deployment. You may need to reconfigure the deployment end time before Ruskin will allow you to enable the instrument; any end time is acceptable as this will be reconfigured by the RBRcervello.
- Stop the deployment again. This ensures that only a negligibly short deployment is stored within instrument memory.
- Disconnect the instrument from the computer, reconnect the umbilical cable to the SSM, and recouple the SSM and instrument.
To bench test the system, connect all of its component pieces together: connect the instrument and RBRcervello to their respective ferrite holders, and the ferrite holders to each other via a test loop (as described in Required tools).
- For convenience, remove the internal assembly of the RBRcervello from the external tube.
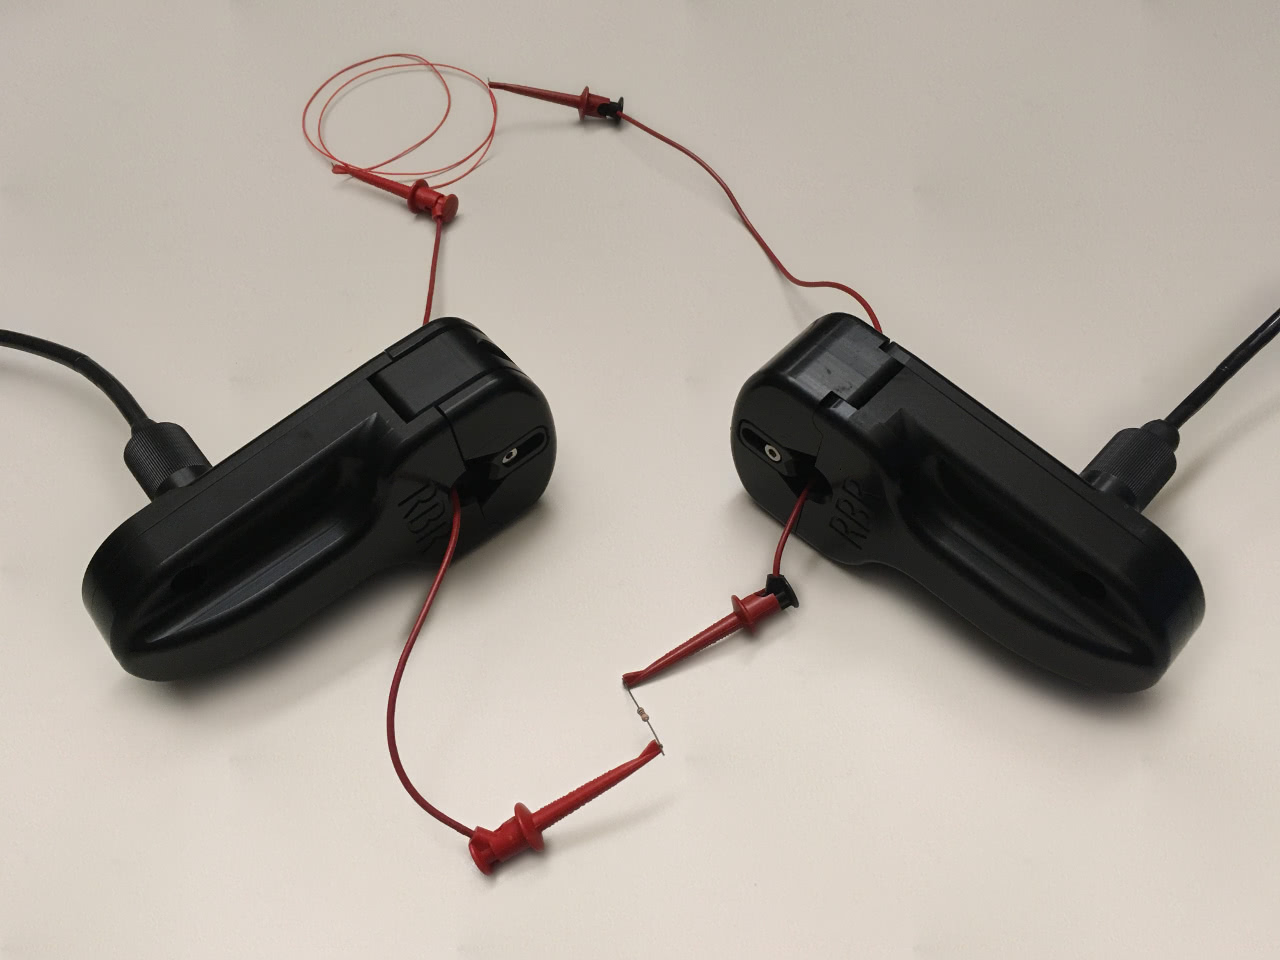
- Pass the test loop through the ferrite holders. The loop need not be held tightly by the anti-strumming bar, nor does it need to make contact with any part of the holder: passing through the middle of the ferrite is all that is required for functionality.
Then, connect either of the batteries in the lower section of the internal frame of the RBRcervello to either of the adjacent connectors labeled “Battery”. The RBRcervello will then boot. This process will take up to two minutes. After the data controller has booted, it will search for and connect to an available instrument, determine whether it needs to download any data from the instrument, and then start a new deployment.
- If the MLM is operating, you should hear the ferrite holders “chirping”: short bursts of low volume, medium-pitch, audible noise.
- If there are optical sensors on the instrument, you will see them light up when the data controller starts the deployment and as the instrument continues sampling.
- The data controller will send collected instrument data and its own diagnostic data (battery levels, GPS position) every half-hour after the deployment has started. Data will appear within a few minutes of this telemetry event on the data hosting webpage for the RBRcervello and instrument. To determine the data hosting URLs for your data controller and instrument, please contact RBR.
If the instrument does not seem to start, commence with troubleshooting, or contact RBR support.
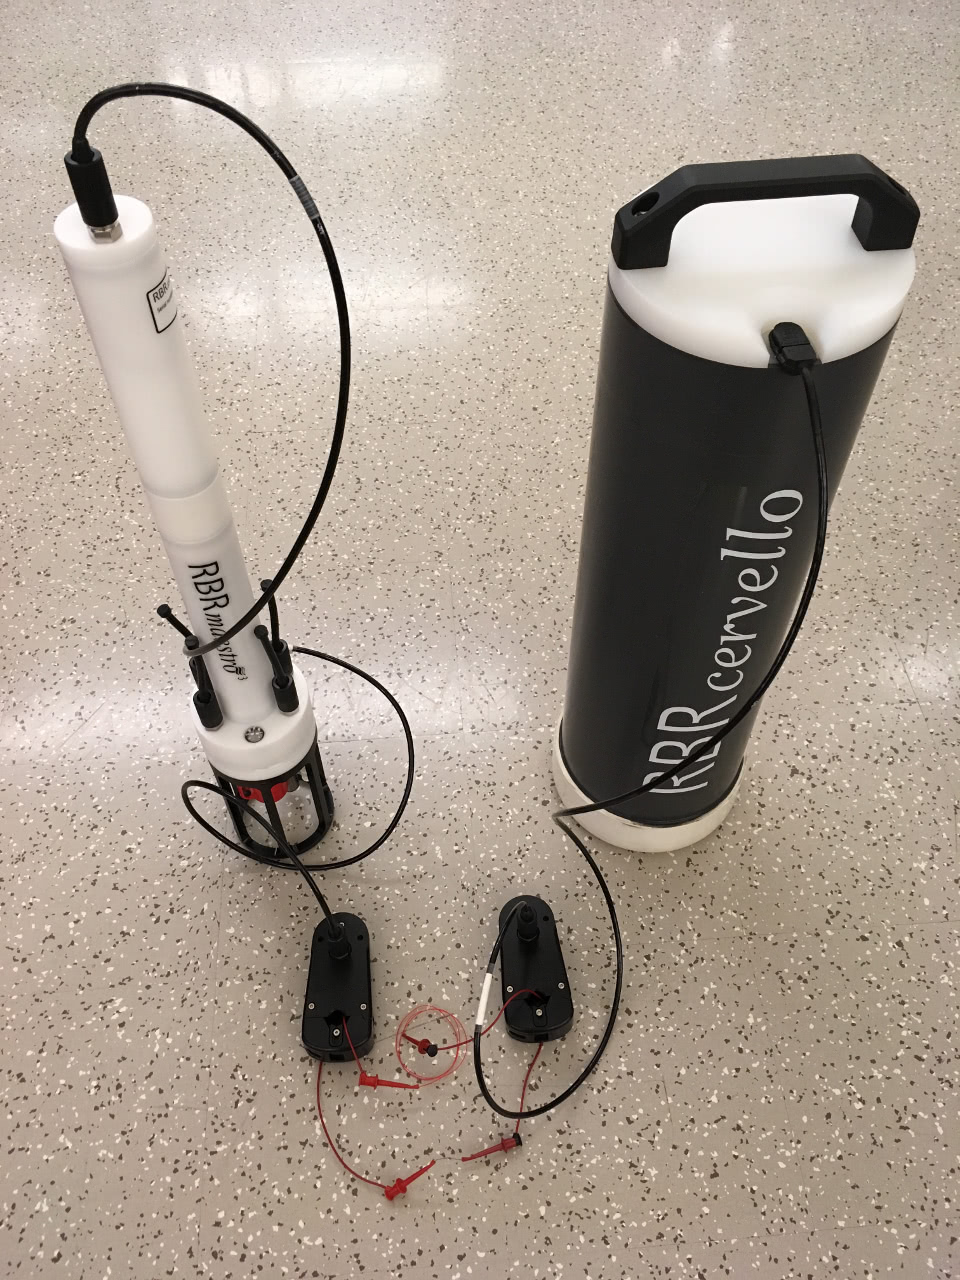
Top: the system, assembled for test
Bottom: the MLM test loop with 50Ω resistor